Quick & Easy Bathroom Makeover
Every summer I have a huge list of home improvement projects to do. You know, since I supposedly have more time to do them. Which never turns out to be quite true, but it sure makes me feel really wonderful when I am actually able to complete one or two of them!
This summer, the upstairs bathroom was on my list.
When we moved into our 100+ year-old home five years ago, the upstairs bathroom was the very first room I fixed. Even though just about every room needed quite a bit of help, it wasn’t a difficult decision to begin with the bathroom. It was obviously something that had been added to the attic much later in the house’s life, and it wasn’t done particularly well. There wasn’t a lot I could afford to do but paint it white to brighten up the ugly, brown walls.
We replaced the toilet about four years ago, which was a nice little update. A couple of years ago, when my dad was visiting, we finally pulled out the awful white linoleum that was stained and gross and replaced it with a lovely grey/brown linoleum. My dad also put in a new vanity, replaced the baseboards (the person who had put them in before did not bother to miter or anything, plus they were the flimsiest wood you could imagine), and we got new mirrors.
I did all of this during my unblogging period, so here are a few photos of the old and new updates.
Old linoleum and toilet:
New linoleum and toilet:
I could have photoshopped out all the paper or whatever on the floor. But I’m too lazy, and I like to keep it real. You may also notice the ugly paint spots on the wall. When we replaced the baseboards, my mom began to touch up some spots that needed touching up, but it turned out that she used the paint we used for the baseboards and not the wall. White is funny that way…never actually matches.
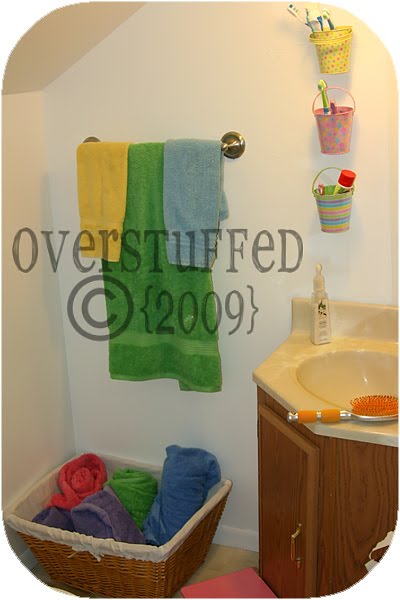
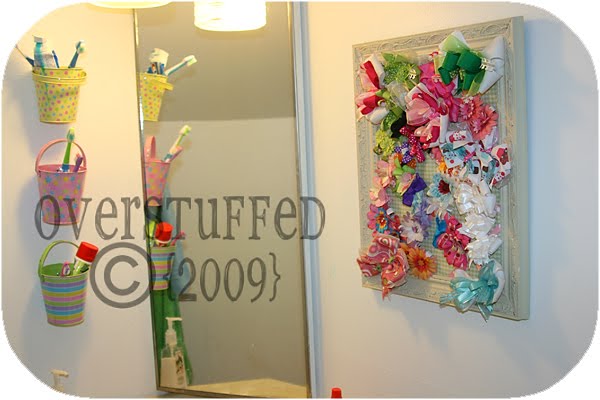
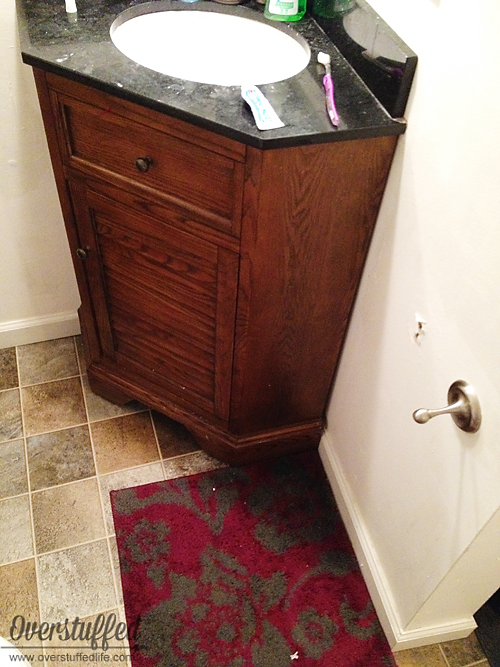
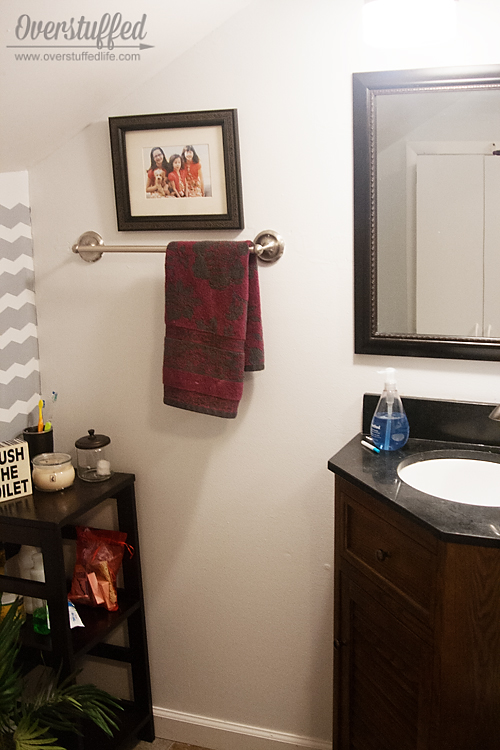
Old vanity and mirror area:
New vanity and mirror area:
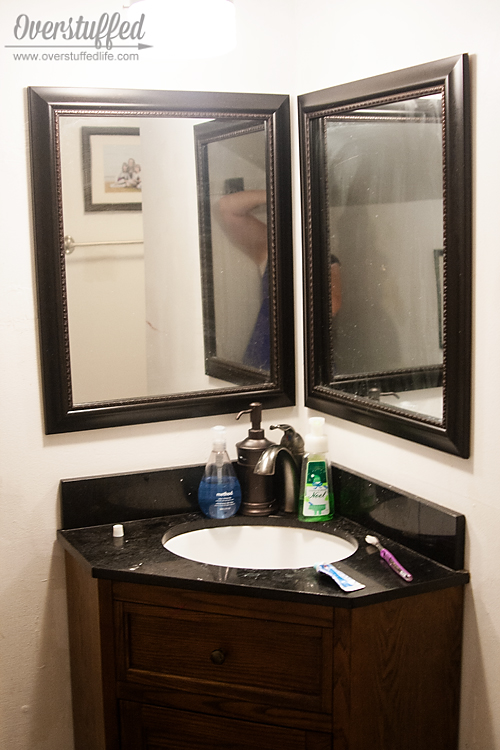
Yep, just keepin’ it real there. The vanity usually has toothpaste smeared all over it and the mirrors are always smudged. In fact, it may actually be cleaner in this photo than it usually is. I bought the vanity online, though it came sans faucet, so I bought a nice faucet locally. (To see the vanity I purchased, click here: Pegasus Palmetto Vanity.) I was also incredibly proud of myself for thinking of the idea to just buy two framed mirrors for the mirror. The corner medicine cabinet thing was super annoying and you couldn’t even open it all the way because it would hit the light. The room is small and cramped with very low ceilings (I can barely stand up all the way in there), but it’s perfect for the girls!
Last fall, I bought another thing to hold bathroom storage. There is a large cupboard in there, but you can imagine that with three girls—one of them a newly minted teenager—storage space is always an issue. (To see the shelf unit I purchased, click here: Winsome Wood Shelf.)
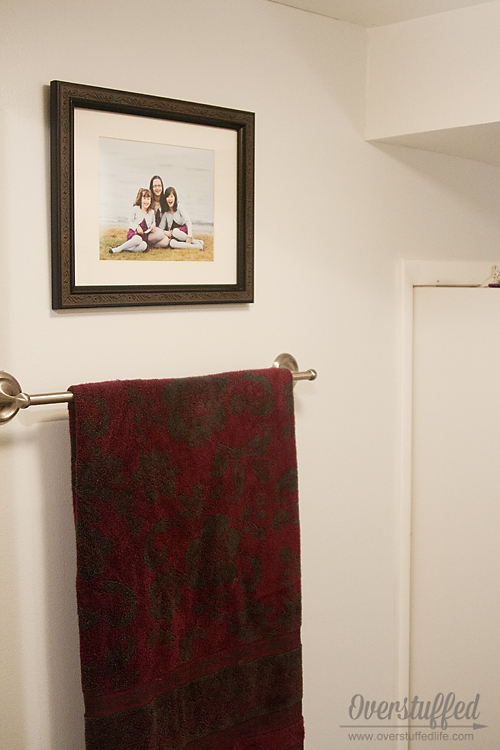
Again, just keeping it totally realistic with the towel there.
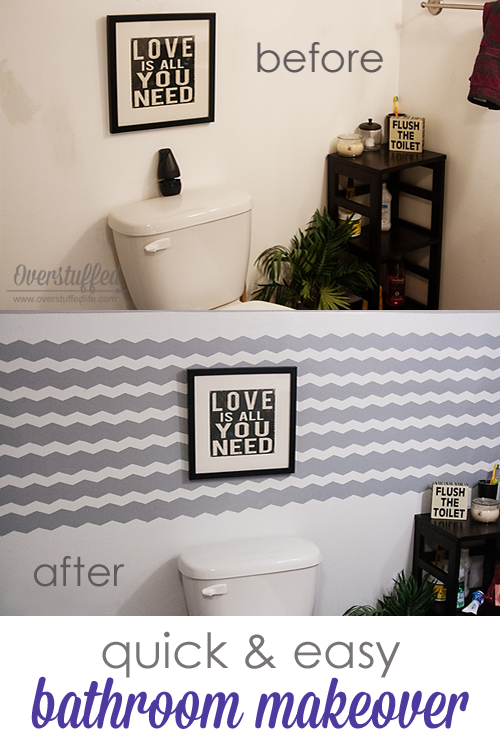
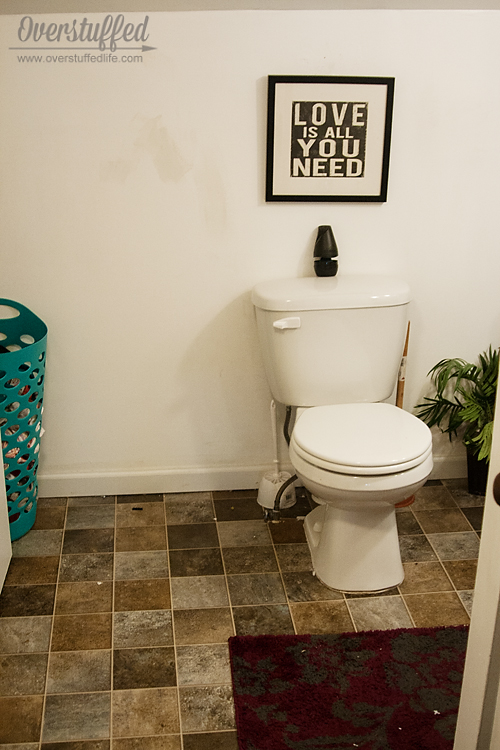
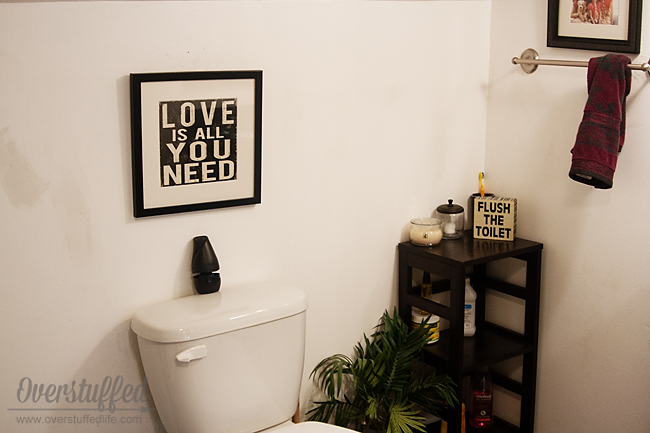
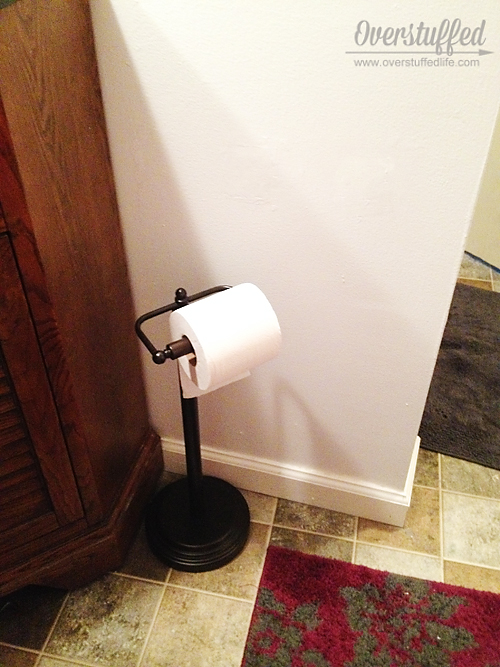
Overall, I have really loved the more mature look of the bathroom these last couple of years as we’ve slowly improved it. But it was desperately in need of a new paint job, and we also needed to do something about the toilet paper holder.
The one that was here from the 1970s when we moved in was broken like this. This one that I replaced into a different part of the wall, using butterflies and everything eventually broke as well. And no matter what we did to try and repair it, it continued to insist upon being broken. I think it’s just because it’s on the wall opposite the toilet, and it’s not close enough to really get the paper off gently, if you know what I mean. I think I had no hope of it never being pulled out of the wall again as long as children used this bathroom.
So, on the list was to fix the TP holder, repaint, and do something to give the room a bit of oomph.
I chose a very light grey paint color (Sherwin Williams Ice Cube). The difference is very subtle, but you can tell against the baseboards and doors and I really like it.
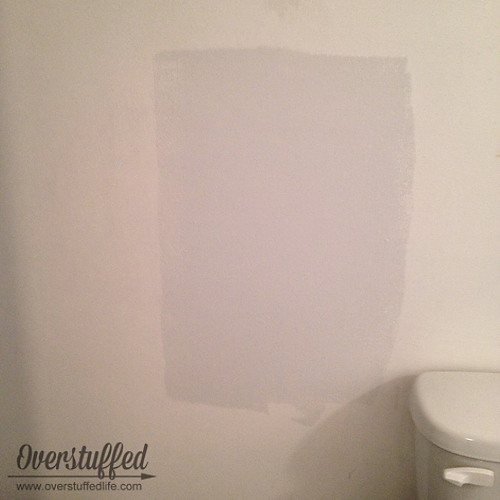
It’s really so subtle I don’t think I could capture it in the photographs, but it’s lovely.
The easy part was fixing the toilet paper holder. I just bought one of those standing ones. Now, assuming that people bother to actually put the roll on the holder, I won’t have to worry about it breaking off of the wall. I wasn’t totally able to hide the earlier holes, but I’ll have to worry about that later. It looks a bit better in the photo than it does in real life.
For the focal point wall, I decided to go with some grey chevron stripes. I used Sherwin Williams Morning Fog and some Frog Shape Tape in chevron. Putting it up was super easy, and a lot quicker than trying to tape my own chevron pattern would have been!
The secret to clean lines with Frog tape is to first paint over it with the original paint color and let it dry, then use your design color. So I painted it with Ice Cube first, and then went over it with Morning Fog. It came out GREAT! I only needed to touch up a few spots and I am very happy with the finished product.
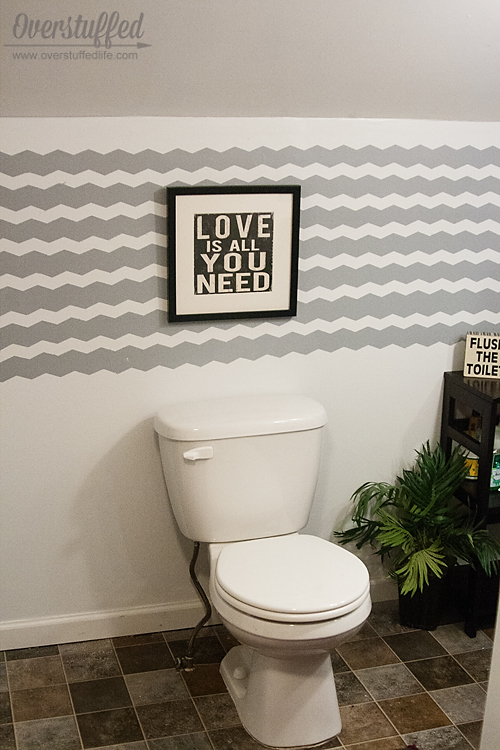
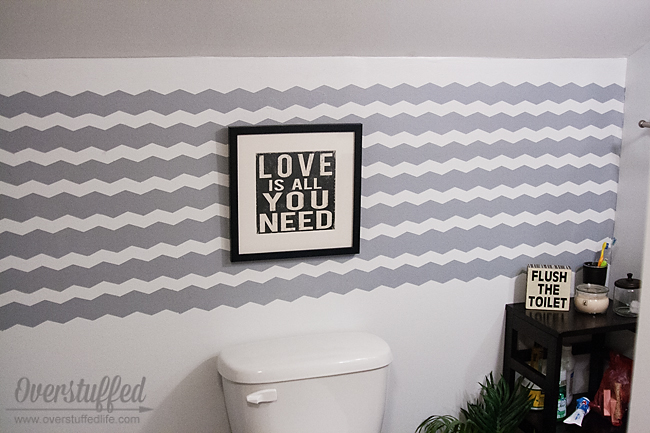
Love it! And, love is all I need. So I’m doing pretty well.
One summer home improvement project down, about six more to go! Next up, front door. Stay tuned…
This post may contain affiliate links, for more information, please see my disclosure.

I love your chevron focal point – it is so pretty. I haven't tried their new shape tapes yet but, the more I see them the more I know they are in my future. Love it, Lara
I need to try the frog tape (and thanks for the painting tip!) as I want to do something fun in our mast toilet area!
This was my first time, and I am hooked!
I was so surprised at how easy it was to use–it's good stuff, and perfect for a fun wall in a small room like a bathroom.
So cute! I love the frog tape shape tape. Best invention ever! You used it in an awesome way!
I'm just curious, how far is the reach to the TP? Seems like it's a stretch. Would it be closer to if it was placed on the other side near the stand? To even it out, you could always add another matching plant right by the door.