
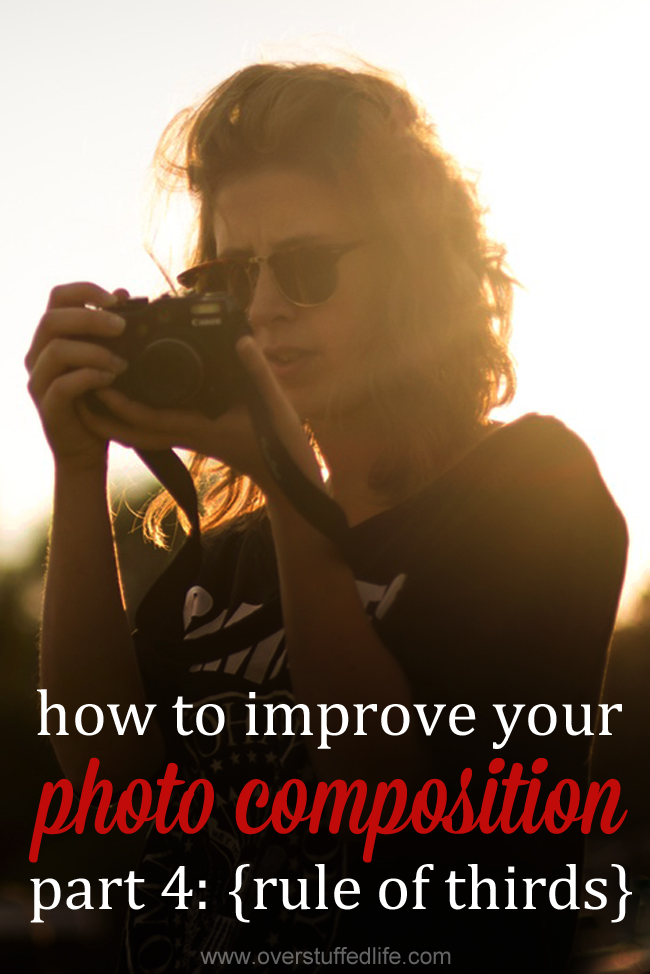
How to Improve Your Photo Composition: Use the Rule of Thirds
This post is the fourth in a photography series on improving photo composition. To see the rest of the series, click here: How to Improve Your Photo Composition Series.
The greatest thing about photography is that the camera doesn’t matter as much as you think it does. The photographer’s eye and the composition of the photo are much more important than the quality of the camera used. I’ve already talked about how zooming, angles, and visual triangles all help to improve photo composition, and today I’m going to talk about how understanding the rule of thirds will help you create more interesting photos.
How to Improve Your Photo Composition: Rule of Thirds
Some cameras and phones actually have a “rule of thirds” grid available in the viewfinder to make this easier, but the gist of it is: divide your photo into thirds both horizontally and vertically and then place your subjects at the cross hairs.
Most amateur photographers will place their subjects right smack in the middle of the camera. While this is not necessarily a bad thing, like a straight-on photograph, it’s simply not as interesting. The eye really likes photos that draw the eye through the scene and the rule of thirds helps with that.
Using the rule of thirds in portraits
When doing a close up type portrait, you will want your subject’s eye to be at one of the intersections created by dividing your photo in thirds.
In this photo of my husband, you can see that one of his eyes does indeed just that:
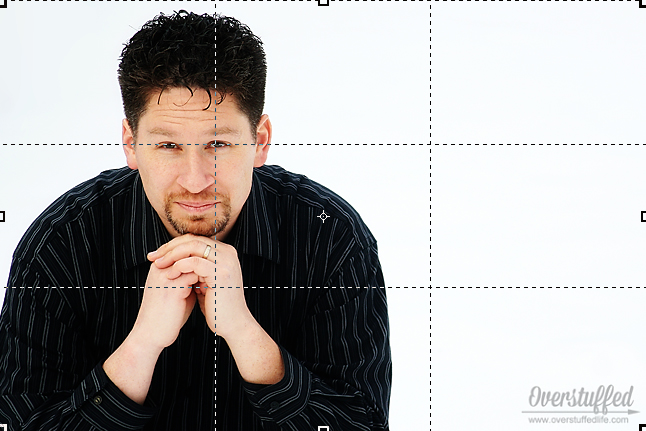
That happens to be a perfect example, but it doesn’t have to be quite so perfect to be effective. The following photos are all pretty close to having the eyes right in the cross hairs, but none of them actually does.


But you can still see that the rule of thirds has been effectively applied in each photo.
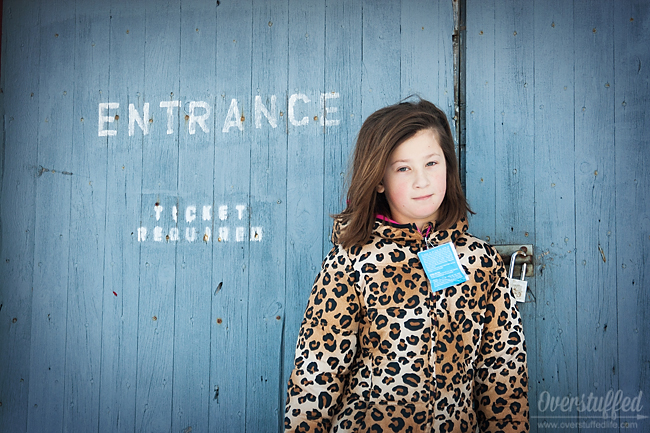
When doing full-body portraits (or even candid shots), applying the rule of thirds can help make those more pleasing to the eye, too.
Consider this photo of my daughter standing on the beach. You want your subject to be on one of the outer thirds of the photo instead of right in the middle. This draws your eyes through the scene and creates a story. If she were right in the middle, the beach would feel more broken up and that story wouldn’t be told quite as well.
Here are a couple other full-body shots that follow the same rule:
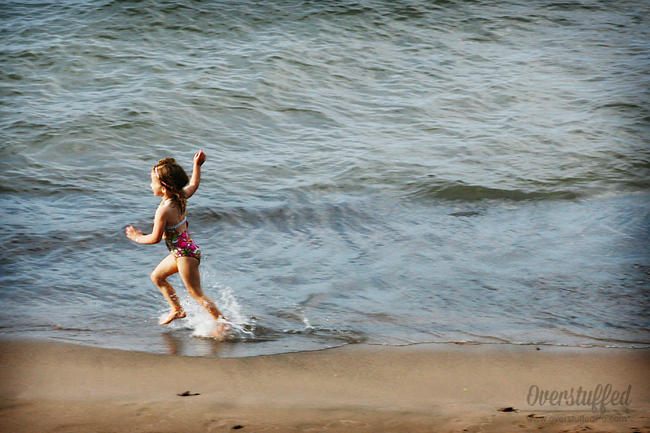
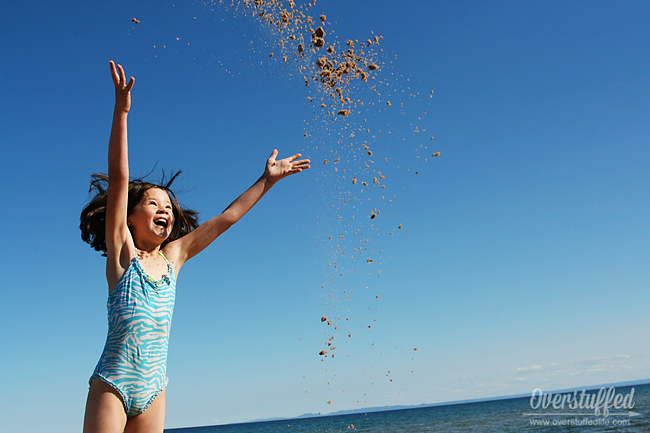
(Why yes, we do like going to the beach—perhaps I’m getting overly excited for it since spring is definitely in the air!)
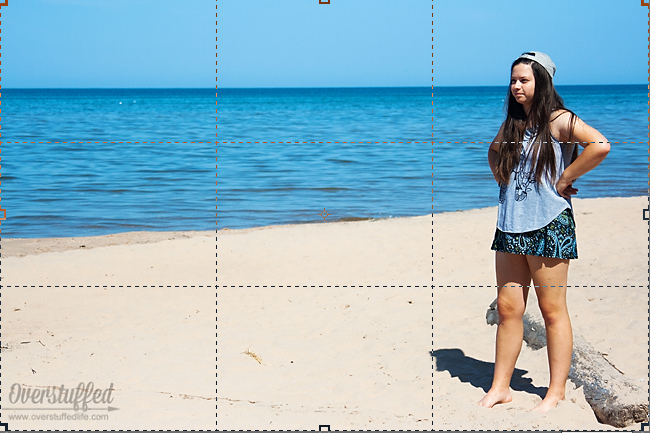
Using the rule of thirds in landscape photography
The basic rule for landscape photography is to make sure that the horizon line is either on the upper third or the lower third of the photograph—never straight through the middle. Again, this does not have to be mathematically perfect.

I especially like beach photos because you get the division of the sand, water, and sky so that the whole photo is in thirds. And since we spend a lot of time at the beach in the summer, I’ve got a lot of them!
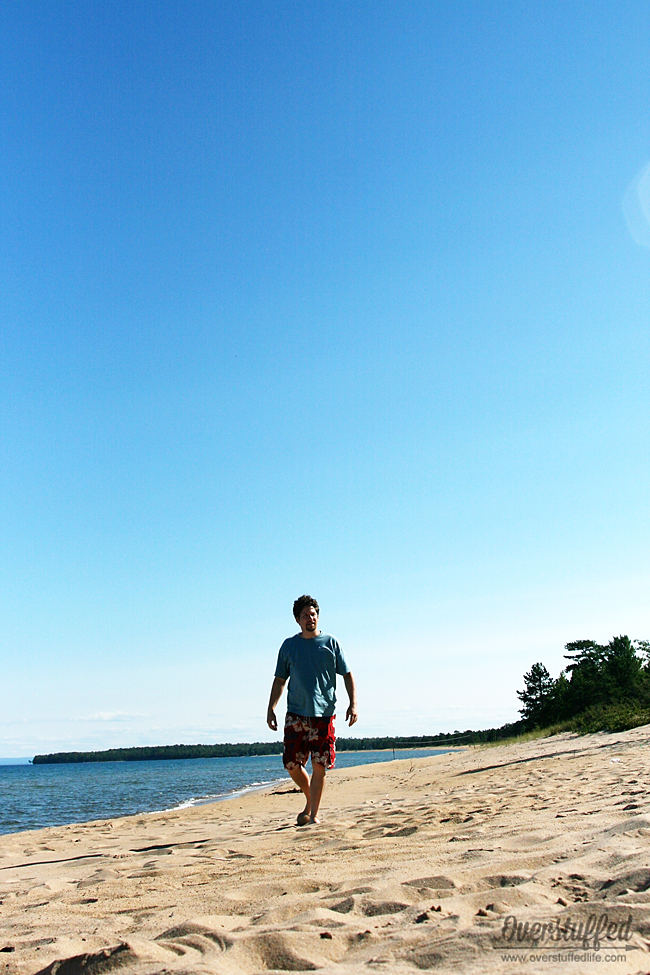
In the above photo, I put the horizon in the lower third of the photo and let the sky take up the top two-thirds. In this case, the subject is right in the middle, but that’s okay because the entire photo is using the rule of thirds.

In this photo, the horizon is also low in the photo and the subject (the tree and flagpole) is also off-center.

This is one of my favorite landscape photos I’ve ever taken. I actually did put the horizon right through the middle, but because of the reflection of the trees in the water, the rule of thirds is being employed perfectly. Do you see it?
When you have your camera out, start noticing how you can make use of the rule of thirds. Sometimes it’s as simple as remembering to put your subject slightly off center or to raise or lower the horizon line. Play with it and see what works and what doesn’t!
Next week will be the final installment of our composition series—all about candid shots!
This post may contain affiliate links, for more information, please see my disclosure.


