
How to Decorate Your Christmas Tree: Part 1
Part 1 in a 5-part series about how to decorate your Christmas tree.
Each year, when I post pictures of my tree, I get several emails with questions about how I did it. So, this year, I decided to take pictures during each step of getting the tree up and do a series of posts explaining how I do it. Decorating my tree is a PROCESS (and I never quite realized what a long process it is until I decided to document every step), so this little series is quite the labor of love and I really really really hope it helps somebody out there with decorating their own tree.
How to Decorate Your Christmas Tree
Decide on your tree color and theme
Before you start, you need to decide a few things, namely color scheme and style/theme. (Also if you’re going with real or fake, but that’s neither here nor there because I suspect you already have quite the opinion on that.)(I like artificial trees myself.)
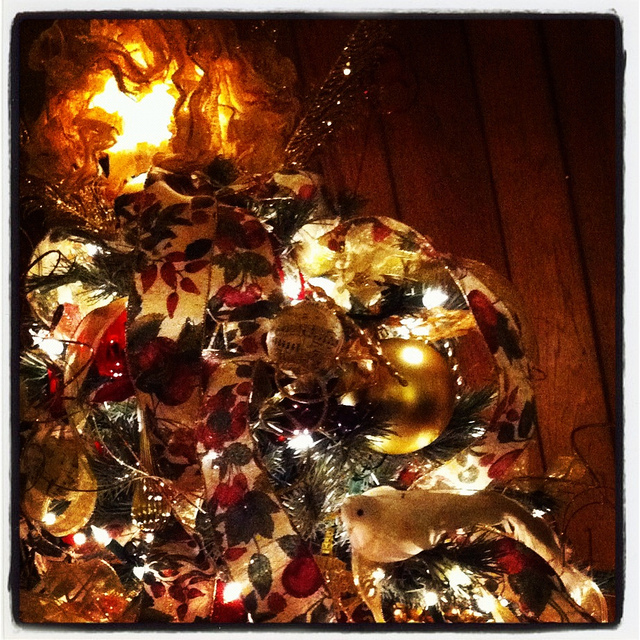
My color scheme is red and gold. It has been that way since the first Christmas that my husband and I spent together as married folk, way back in 1999. So far, I am not tired of it, which is good, because I’ve amassed quite the collection!
Some other color schemes you might consider:
- blue/silver
- purple/pink/blue
- red/green
- white/gold
- white/silver
- red/white
- purple/silver
- green/white
- green/silver
- pink/red/white
- black/gold
- black/silver
- silver/gold
The possibilities are endless! I stick to two colors, but having a third or even a fourth color in there is totally up to you. You might base your colors on the room where you put up your tree, a favorite ornament, or just the color combo you like best.
Style is important, too. You might choose a more rustic look with wooden ornaments, Raggedy Ann dolls and raffia. You might like something more whimsical and colorful. Or you might (like me) go for the totally decadent and overly baroque tree that is dripping with sparkly things and ribbons and flowers and more sparkly things.
I also have kind of a music theme, too, so if I find any ornaments that are either red or gold and also musical, it’s a given that they’ll be going in my shopping cart if the price is right.
This year I bought a new tree for my children’s homemade/schoolmade ornaments to go on and I went with a more colorful (bright pink, purple, blue, and green), child-like theme since that will match all of their handmade ornaments better.
Where to buy Christmas tree decorations
Once you’ve decided on color and style/theme, you need to find stuff to put on your tree. I’m kind of cheap and don’t like to spend a ton of money on anything if I don’t have to, and this applies to my Christmas tree as much as anything else. So here are a few rules I like to abide by when it comes to collecting ornaments:
- Don’t pay full price. In fact, don’t even buy ornaments before Christmas if you can at all help it. After Christmas clearance is the way to go.
- Look at places other than your standard Target/WalMart, although they can have lovely things, too. Some of the best clearances to be had are at Macy’s or other stores like it. And don’t forget the craft stores: Roberts, Michaels, Hobby Lobby, etc.
My mom is just as in love with tree decorating as I am (I learned it from her!) and often buys me new ornaments when she hits the clearances for herself. We have different color schemes, so when she sees one that would work with my tree she just can’t help herself. I sure love her! (And not just because she buys me Christmas ornaments!) - If you must buy ornaments before Christmas, go to the dollar store. Especially for your ball ornaments. You get way more bang for your buck (yes they are plastic, but I much prefer that over glass in a house full of kids) and they have a really good selection. Also check there for things like ribbon, flowers and floral picks.
- Save everything that would look good on your tree and within your color scheme. I have things on my tree that aren’t necessarily “ornaments” but came tied to a gift we received. Ribbon is especially wonderful to save…if someone uses great ribbon on a gift they give to you, and it matches your tree, keep it! I use any gold ribbon I get to tie ornaments to the tree. It may take longer but it is so much prettier than the hooky thingies, and they tend to stay on better with ribbon anyway.
- Don’t worry about having too few ornaments your first few years. Your tree will still be beautiful and you will continue to collect. My tree has about 5 times the ornaments on it this year than it did when we were first married (I’ve also retired many of them over the years).
Okay. Let’s get that tree decorated!
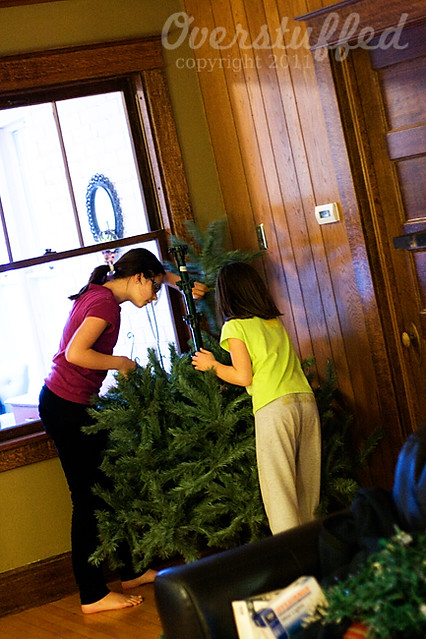
Put up the tree
Or, recruit your children to do it. This is actually the first year that my girls put the whole thing up all by themselves, with only a little help getting the top on. I was so impressed!
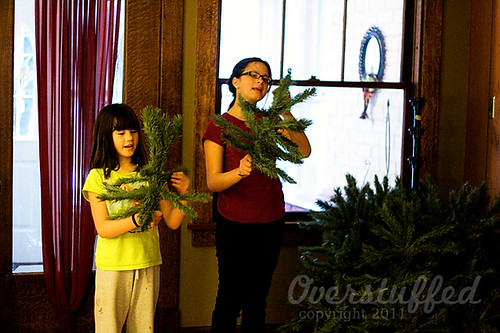
It is EXTREMELY important that you listen to Christmas music while putting up the tree. And that you sing along as you go.
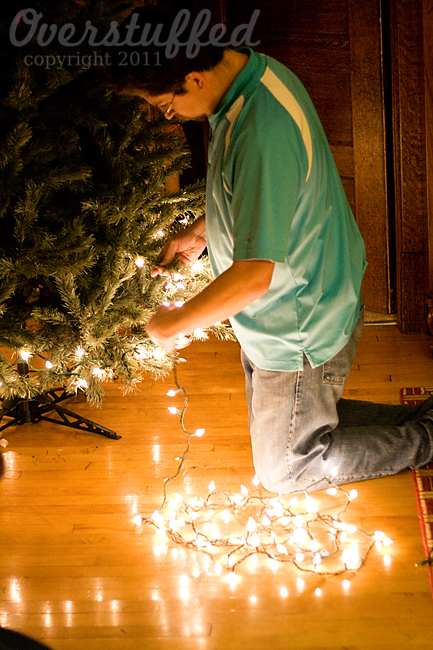
Put up the lights
Once your tree is up, the next step is the lights. This is my husband’s area of expertise, though I have trained him well. He knows to wind those lights around every single branch and get that tree covered.
I was kind of bugged this year because (as usual) a bunch of the lights decided to stop working while they sat in storage for a year and the ones we bought to replace are different enough that it is noticeable. So I suppose my next advice would be to try and make sure you always buy the same brand of lights. Apparently they are not all created equal.
Put flowers and floral picks onto the tree
I am probably a little too uptight about the order of the tree decorating. I do think it is important to get things on in the right order because it affects the final product. Now, remember how I mentioned flowers and floral picks? I like to treat my tree as if it were a gigantic flower arrangement (because, isn’t that what it is?) so flowers and picks are pretty central.
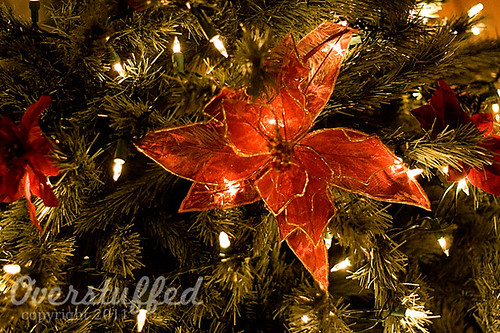
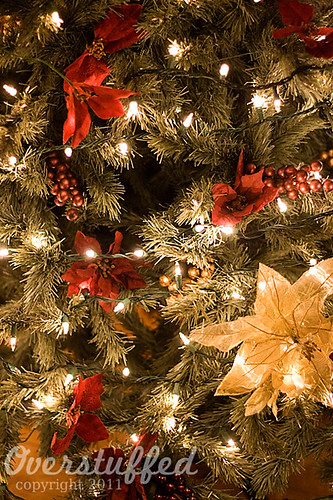
Flowers are the first thing to go on. I have poinsettias that I use, mostly red, but I have a few gold ones, too. I’ve seen some gorgeous Victorian style trees that use roses, but you can use just about any flower that you like that works with your theme. Just stick them down into the branches far enough that you feel they are secure. And they will look something like this when you’re finished:

I also have a few really big red and gold poinsettias that I put on after we do the little ones:
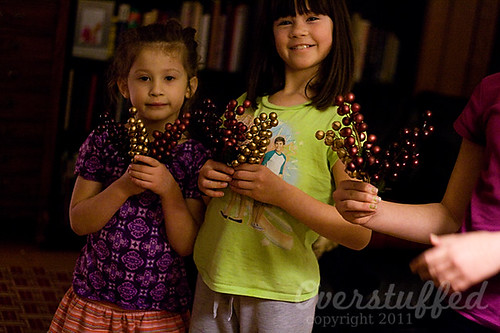
After the flowers, I do my grapes. These are just floral arrangement picks. When I first started my tree I had mauve in the color scheme, so some of them are still that color, but it’s not enough to make a huge difference, so I keep them on the tree.
Again, just stick the picks into the branches so they feel secure. With a fake tree (and I’m sure this would apply to a real one as well), you just stick it right in the place where two branches meet and that’s perfect.
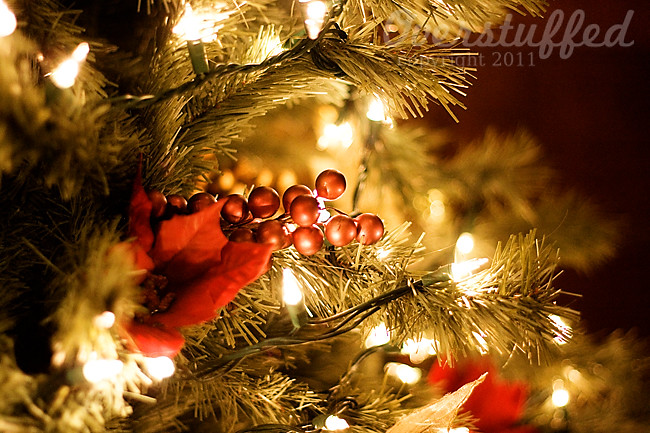
By the way, taking photos of each of these steps wasn’t so easy, so I hope you can tell how I did the grape things okay.
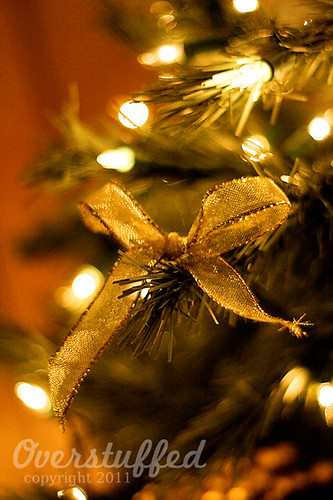
Add bows to the branches
The next thing we do is put little bows on the branches. These are from the first year I had the tree and they are still in great shape. Use wired ribbon for this because it will hold its shape better. I purchased several spools at a craft store, tied the bows and then used craft wire to secure them to the branches. The craft wire stays on while they are in storage and all I have to do each year is fluff them up so they don’t look smooshed and they’re good to go.
That’s where we’re stopping for Part One. This is what our tree looks like so far, with only lights, flowers, grapes, and a few bows. It’s already so pretty!
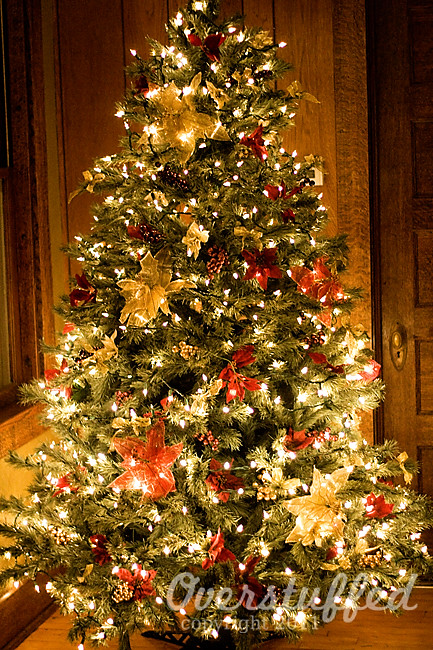
(And darn it, you can totally tell the difference between the two types of lights we used. It totally bugs.)
Click here for Part 2: Putting up large and specialty ornaments


So pretty! Red and Gold is our color scheme too. I bought one of those giant ornament boxes from Target a few years ago, and built around it. Pier One has great ornaments and Christmas decorations that I buy after Christmas.
I am so glad you are giving instructions on how you decorate your tree. I feel like I need some serious help in this department. So I can't wait to see your next posts on this topic; and I can't wait until next year when I will be able to decorate my tree in my own home. Have a Merry Christmas Lara!
What did you do when your kids were little and wanted to pick everything off of the tree? This year, we put all breakables above where Kaitlyn can reach, and sturdy ornaments below, and Kaitlyn is having a great time rearranging those ones 🙂
Your tree is gorgeous, Lara! Very artsy! We put up our tree (a Fraser fir) on Saturday. My 8 year old (Kyla) was begging to decorate it right away, but I wanted to make sure it was drinking water and let the branches relax a little first. Well, Sunday morning I came downstairs to a lighted tree! Some little elves must have done it. I'm usually the one to put the lights on because, I, too, like to wrap them around each branch, but it looked good enough that I decided to save time and just leave it.
A solution for having different brands of lights (for future years): wrap the tree with one type and then layer the other type over. This way, there is a blend of the two types of lights throughout the tree. We had to do this a few years ago and it actually looked good with two different types of lights!