
DIY Thanksgiving Twine Ball Place Card Holders
These simple and elegant DIY place cards will add the final touches to your Thanksgiving table
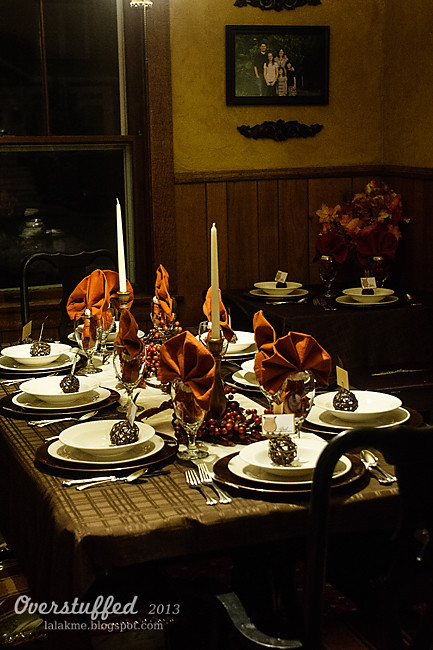
The best part of Thanksgiving is making the table beautiful. It’s not often that I get an excuse to make a really gorgeous tablescape, so I get a little giddy on the holidays where I get to do that. I love getting out my good silver and polishing it, I love coming up with centerpiece ideas, and I even love starching and ironing the napkins.
The problem with this is that I end up having to buy new dishes or chargers or glasses or tablecloths or something so that I don’t get bored with what I already have. This year was no different, but I found all the plates and bowls at the dollar store! So that was cheap. I bought a new tablecloth, too, but everything else was already in my possession—not too bad, right?
Part of the fun of table setting is making the place cards. I love how they turned out this year! Here is how I made them:
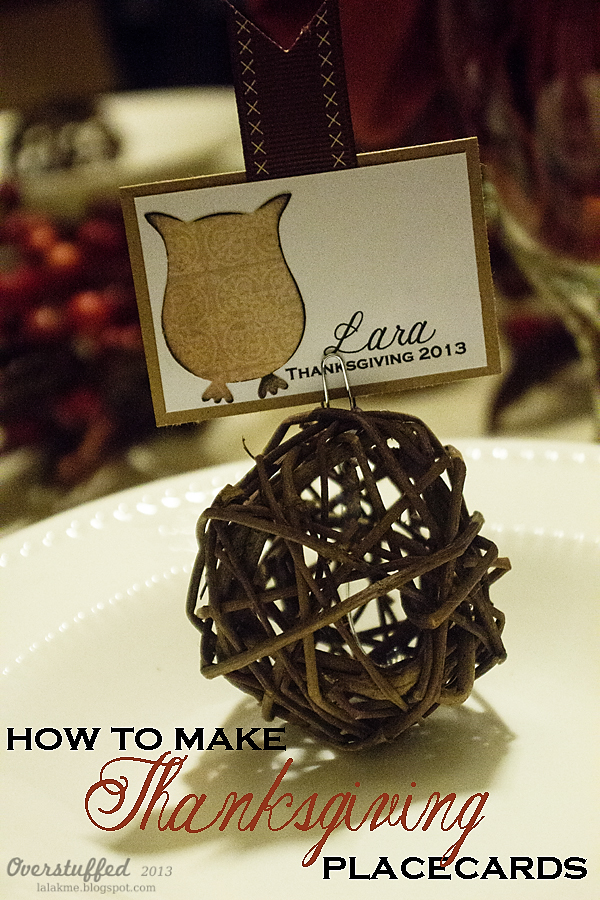
How to Make Thanksgiving Place Card Holders out of Twine Balls
- Purchase a box of “decorative accents” from any craft store. I got mine in the WalMart craft department (it’s the only “craft” store in town). It included the twine balls, plus several other types which I did not use. These are the ones I purchased. You can get similar twine balls here.
- Play with the twine balls to see how they best stand up straight, and then use hot glue to attach paperclips to them. Make sure to put the paperclip in far enough inside the twine ball so that its center of gravity won’t change too drastically once you add the name card. Also make sure to use enough glue so the paperclip stays stable—it may be more than you think.
- Print the names out onto plain white cardstock. For the name cards I used the fonts “Austie Bost Rest of Our Lives” for the script, and “Copperplate Gothic” (should come installed on most computers) for the print.
- Use a punch to punch a design out of patterned paper. I punched owls (I used a punch from Stampin’ Up!, that is now discontinued) out of brown patterned paper, inked the edges with black ink, and then adhered them next to the names.
- Use a paper trimmer to cut the names out.
- Adhere the ribbon to the back of each of the white cards, glue them to kraft colored cardstock, and then use a paper trimmer to cut them out again.
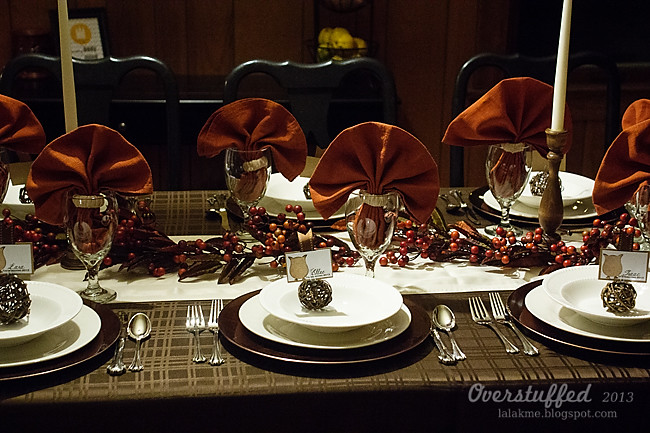
- Put the cards in the paperclips, and have fun setting the table!

My oldest daughter loves to help me with the table settings, and it was her idea to fan the napkins out and place them in the glasses. I had another idea, but was unhappy with how it turned out, and I really loved what she came up with. She told me that if I put it on the blog, I had to credit her with the napkins!
EVERYONE: MY DAUGHTER DID THE NAPKINS AND THEY ARE AMAZING!
Now I’ve got to go get started on the rest of my pies. I ran out of GF flour and had to send my husband out in the snowstorm to get me more—it hasn’t stopped snowing around here for nearly two days!
Regardless of the snow, I am thankful to have my little family to celebrate with, as well as some friends who will be joining us. I wish all of you a wonderfully happy Thanksgiving this year, too.
Happy Thanksgiving!


I just found this–it's so cute! Thanks for using my font! 🙂