
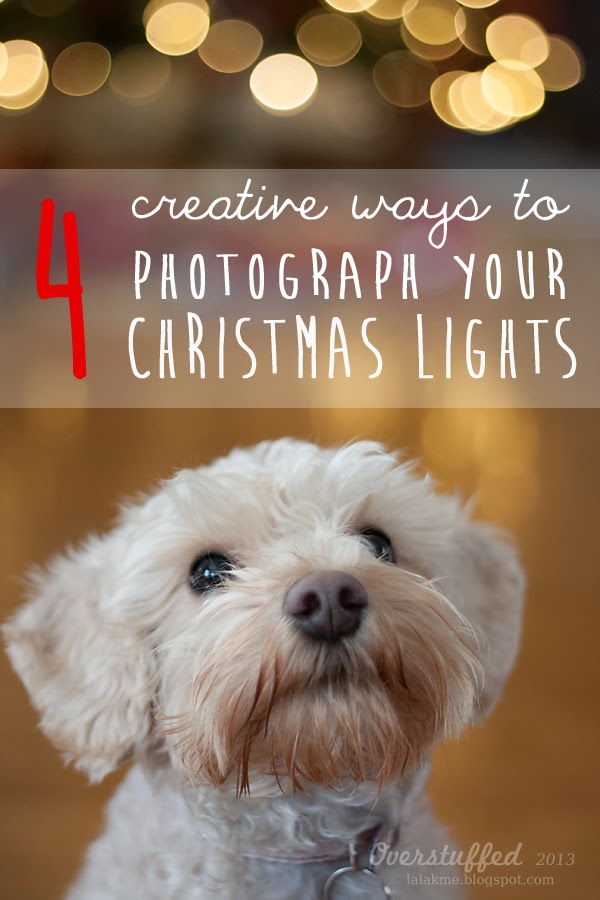
Four Creative Ways to Photograph Your Christmas Lights


How to take amazing photos of your Christmas lights with any type of camera.

Have you ever wondered how to get some of the super cool light effects you see in photos at Christmas time? Me, too. So I decided to learn how to take those creative photos of Christmas lights and now I can’t wait for Christmas to roll around each year so I can take more!
Make sure to check out our Ultimate Holiday Gift Guide—Find hundreds of gift ideas for EVERYONE on your list!
I am not a professional photographer, but it is one of my favorite hobbies. I enjoy taking fun Christmas pictures with my Canon Rebel XTi and the two not-very-expensive lenses that I have. The Christmas lights especially give me a reason to play around with things that I wouldn’t otherwise be able to do.
I’m going to show you four fun ways to get some cool photos featuring your Christmas lights. You should be able to achieve these effects on any dSLR, and even on many high-end point and shoot cameras if you know your way around the manual settings.
How to Take Amazing Photos of Your Christmas Lights
1. How to take silhouette photos in front of the Christmas tree
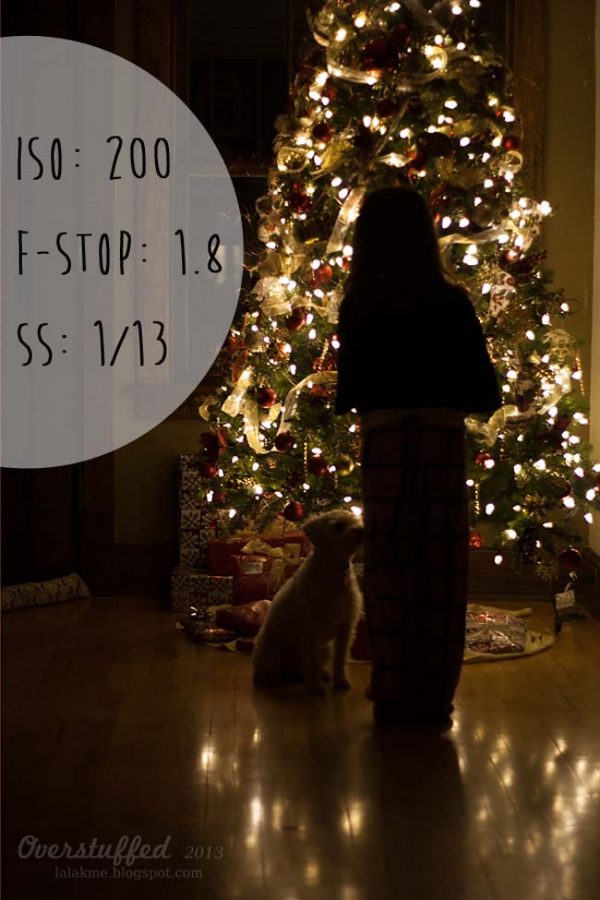
Taking photos of the Christmas tree with the lights on can be really frustrating, because all of the normal rules of exposure don’t apply. You would normally want to choose a higher ISO in such a low-light situation, but for a silhouette to work, you want to choose a lower ISO.
1. Turn all other lights off to make sure your scene is lit only by the Christmas tree.
2. Set your camera to Manual and choose a lower ISO.
I went with 200 for this photo, but it’s a good idea to fiddle with the settings, because no lighting situation is created equal.
3. Choose the widest aperture you can.
I used my “nifty-fifty” (Canon EF 50mm f/1.8 II Camera Lens) to take this photo. It’s an awesome and inexpensive little lens for beginning photographers, and perfect for this type of photo. Since its lowest f-stop is 1.8, I went with f/1.8.
4. Choose a slowish shutter speed, but not too slow.
What works best will depend on the focal length of the lens you are working with, but somewhere between 1/10 and 1/20 should do the trick. I went with 1/15 to start with, but was happier with my results at 1/13.
Here’s a quick rundown:
Silhouette photos in front of the Christmas tree lights:
- Manual mode
- Low ISO
- Large aperture (lowest f-stop number)
- Slowish shutter speed
2. How to make your Christmas lights twinkle in photos
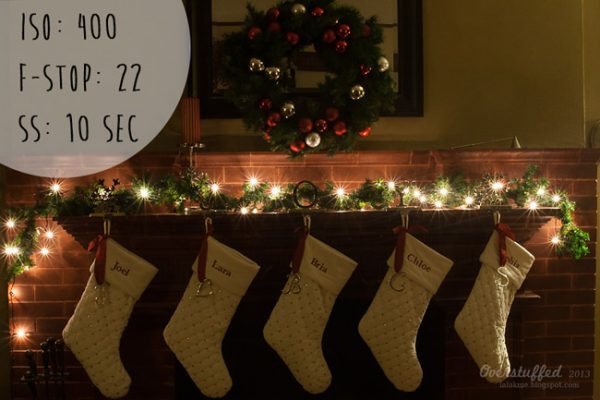
I love getting those Christmas lights to really sparkle in photos—they look so beautiful!
The amount of “sparkle” coming from the light is going to depend on the blades in your lens. I like to use my Canon EF 28-105mm f/3.5-4.5 II USM Standard Zoom Lens, which is another amazing and inexpensive lens. (You can’t get it new anymore, but you can find it used.) It has more blades, so it is especially amazing for the twinkly light photos.
Here’s a close up—just look at those gorgeous twinkle lights!
If you have a lens with fewer blades, that’s okay. Your lights will still look really pretty and sparkly if you follow these steps. The twinkles will just have fewer rays.
1. Use a tripod.
If you don’t have one, you can set your camera on a stable surface, instead.
2. Set your camera to manual mode.
3. Set it to a lower ISO.
I used ISO 400 for this picture.
4. Set it to a small aperture.
In order to get the twinkle effect, you want to choose a very small aperture (high f-stop number). I went with the highest f-stop this particular lens can go to, which is f/22.
5. Set a slow shutter speed.
Because you are using such a small aperture, you’re going to have to use a very slow shutter speed. This is why you need to use a tripod. If you don’t, you’re going to end up with a big blurry photo with no twinkly lights in sight!
The other tip to making sure this photo doesn’t turn out blurry due to the slow shutter speed is to either use the timer on the camera or a remote. I usually use a remote, but the button on mine is having issues, so I used the timer to get this photo.
When I do these photos, I just play around with the shutter speed settings until I get the effect I am looking for, but I start with the shutter speed that will get me a perfect exposure.
Note: I have learned that LED lights are a little harder to get this effect with than regular Christmas lights. It’s still possible, but something about the way the LED light works doesn’t lend itself quite as well to the twinkling. The lights on my mantel are not LEDs, so I was very pleased with how twinkly they turned out.
Here’s a quick rundown:
Make your Christmas lights twinkle in photos:
- Use a tripod
- Manual mode
- Small aperture (highest f-stop number)
- Very slow shutter speed
- Use the timer or a remote
3. How to get Christmas light bokeh with manual focus
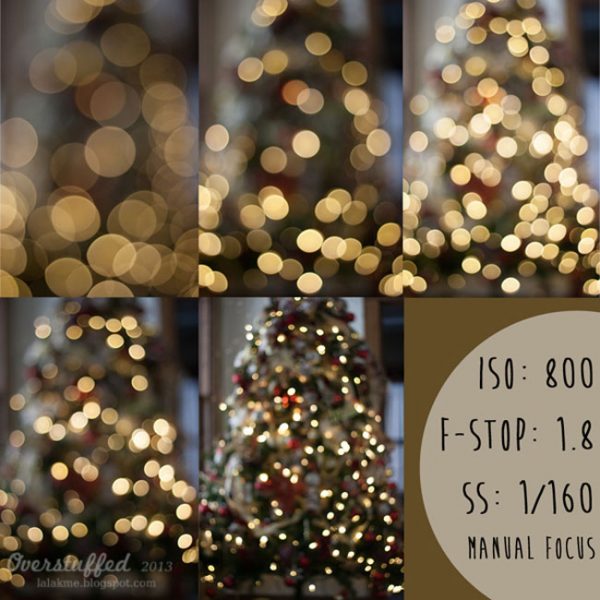
Bokeh is the background blur that happens in photos shot with a shallow depth of field. When lights are in the background bokeh, it is especially beautiful.
This first technique is the easiest way to get Christmas light bokeh, but only if the lights are the only thing you are photographing.
1. Use Aperture Priority mode (AV)
2. Set your camera to manual focus.
There should be a switch on your lens to switch it from auto focus to manual. This way you can control the focus by manually turning the focus ring on the front of your lens.
3. Open the aperture all the way.
You will need your aperture to be wide open for these to work. If you don’t open your lens all the way, you will get hexagon/octagon shaped bokeh.
I used my nifty-fifty again, and opened it to f/1.8.
4. Choose the ISO best for your lighting.
The ISO I used was 800, but I’ll be totally honest and tell you it’s because I forgot to set it lower from the photos I was shooting right before. I could have gone lower, but it didn’t really end up mattering. The shutter speed will be chosen by the camera since you will be shooting in aperture priority, and my camera chose 1/160 for this particular lighting situation.
5. Play with your focus ring until you achieve the look you want.
I took all of the above photos from exactly the same spot in my living room, and none of them is cropped. When I moved the focus ring all the way out of focus, the first picture was the result. As I slowly moved it back into focus, the remaining pictures (in order) resulted.
I personally like the third picture best, but you might disagree. Just play around with it and have fun!
Here’s a quick rundown:
Christmas light bokeh with manual focus:
- Aperture Priority mode
- Switch your lens to manual focus
- Use the widest possible aperture (lowest possible f-stop number)
- Choose an ISO appropriate for your lighting situation
- Play with your focus ring until you get the bokeh you like
4. How to get Christmas light bokeh in the background of a portrait
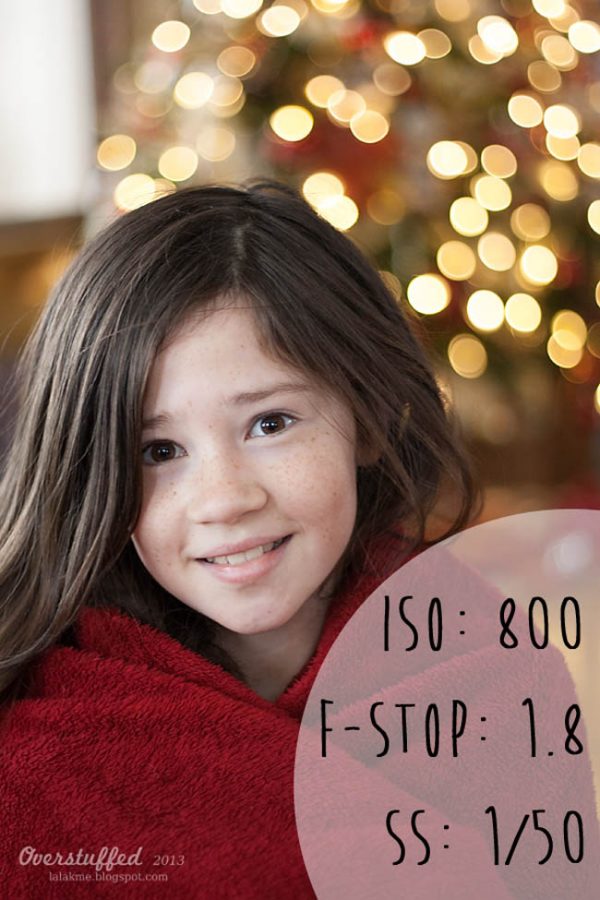
I love getting the Christmas light bokeh in the background of actual pictures of my children. And my dog. And anything else I can think of—like my Christmas cookies!
You’ll want enough natural light for these photos to turn out well. I took this photo in the middle of the day with Chloe facing a window. You’ll also want to sit your subject fairly far away from the lights, depending on your lens. My daughter was sitting about 8 feet in front of the Christmas tree.
1. Keep your camera in Aperture Priority (AV)
It’s easiest to let the camera choose shutter speed since aperture is the thing that matters most for bokeh.
2. Open your lens as wide as it can go (lowest f-stop).
I’m still using my 50mm f/1.8 here, so 1.8 is the aperture I used.
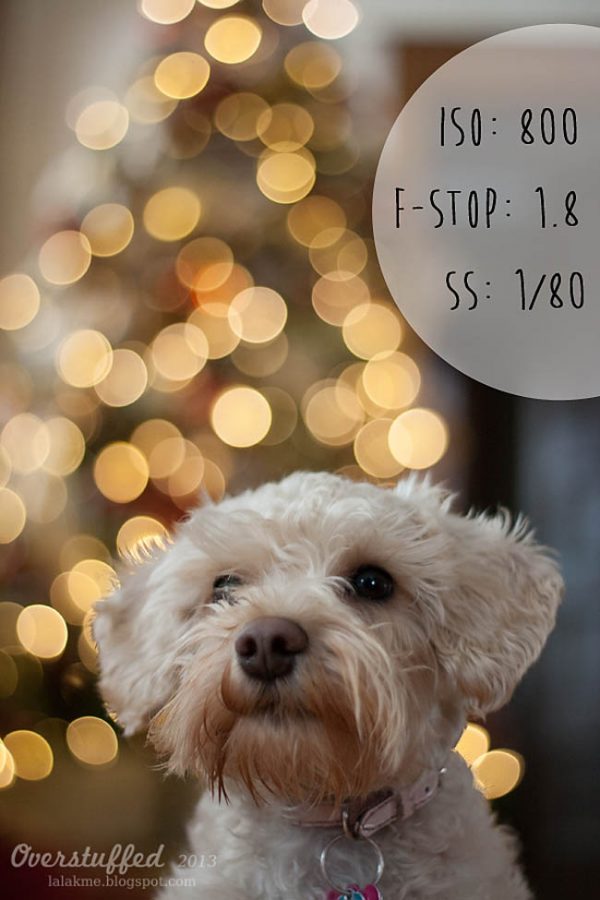
3. Choose an appropriate ISO for the lighting.
Even though we were sitting in front of a window, the light was not very bright, and my house isn’t superbly well lit, so 800 was the best ISO for our situation.
The rule of thumb for shutter speed is to not let it go lower than the focal length you are using. Since I was using a 50mm lens, I couldn’t let the shutter speed go lower than 1/50 without compromising the focus of my photo. That is how I decided to go with 800 for my ISO—if I had chosen a lower ISO my shutter speed would have been too slow.
Remember the camera is choosing the shutter speed for you, but watch it to make sure it doesn’t fall too low. If it does go lower than it should, simply up the ISO.
4. Focus on your subject.
Switch your focal point around and snap away! Depending on the lens you are using, you may have to play around with how far your subject is from the lights.
Note: If you are using a zoom lens, you will more easily achieve bokeh in the background if you zoom it all the way in—just make sure you are always shooting wide open.
Here’s a quick rundown:
Christmas light bokeh in the background of a portrait
- Aperture Priority mode
- Situate subject a good distance away from the lights
- Use the widest possible aperture (lowest possible f-stop number)
- Choose an ISO appropriate for your lighting
- Make sure your shutter speed doesn’t fall too low by adjusting the ISO up if necessary
All right! Now you’re totally ready to go shoot some amazing photos featuring your Christmas lights! Have fun!

This post may contain affiliate links, for more information, please see my disclosure.


Gorgeous!