
How to Make Heart Bokeh for Valentine’s Day
Simple tutorial on how to create shaped bokeh with your camera
Bokeh is the beautiful blurred background you see in many photos—such as the bokeh you see in Christmas light pictures (click HERE to see the tutorial on how to achieve bokeh—numbers 3 and 4 on the list). The camera lens renders the bokeh as circles or octagons, depending on how open your lens is. But did you know that you can make the bokeh any shape you want to with one simple trick?
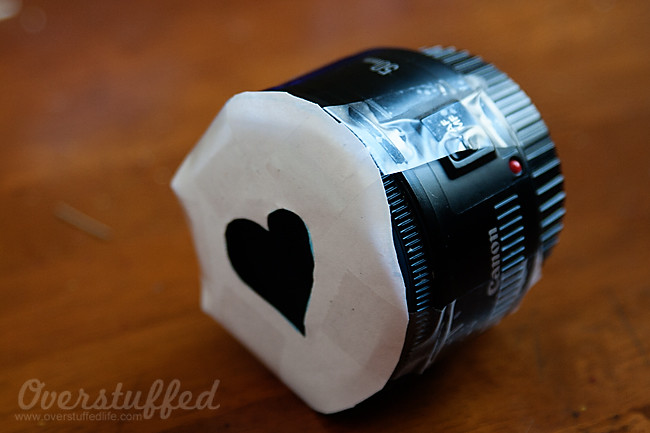
All you need is some paper, tape, and scissors and you are ready to have some fun with your camera! I thought it would be really fun to do some heart-shaped bokeh for Valentine’s Day, so I just made a heart cut-out in some paper, cut the paper down to fit right on my lens, and taped it on.
Two things to be aware of as you do this:
1. Make sure you don’t tape the paper on to the focus rings, or your camera will have trouble focusing.
2. Make sure your heart (or whatever other shape you choose to use) is facing the right way on the lens. Keep in mind which orientation you will be shooting in, too. If you’re shooting in a portrait orientation, make sure you know exactly which way you like to hold the camera so you don’t end up with upside-down hearts.
I set up a background in my living room to do this little photo shoot. My husband got me this awesome backdrop stand for my birthday about 6 years ago, and it’s really handy to have, but you could just as easily tape something to the wall or drape fabric over some chairs. There are also lots of tutorials around the internet to make your own PVC pipe backdrop stands. However, I do love my backdrop stand, too. It stores nicely in a bag and is really easy to set up and take down, and I didn’t have to make it myself! (This Backdrop Stand is very similar to what I have.)
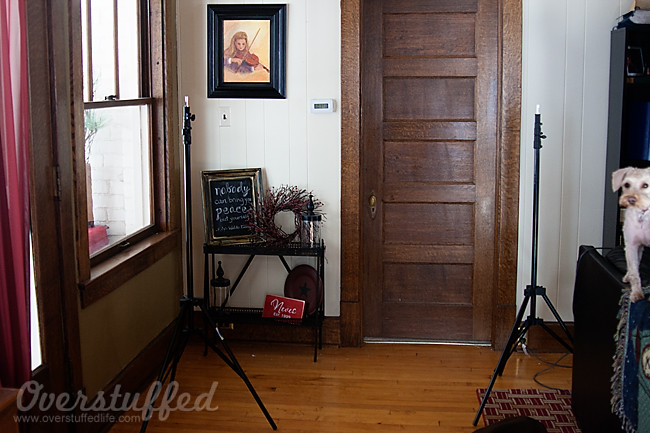
I don’t have a ton of room in my house, nor do I have a ton of light. So I waited until the light was coming through my southern-facing windows perfectly to do these photos.

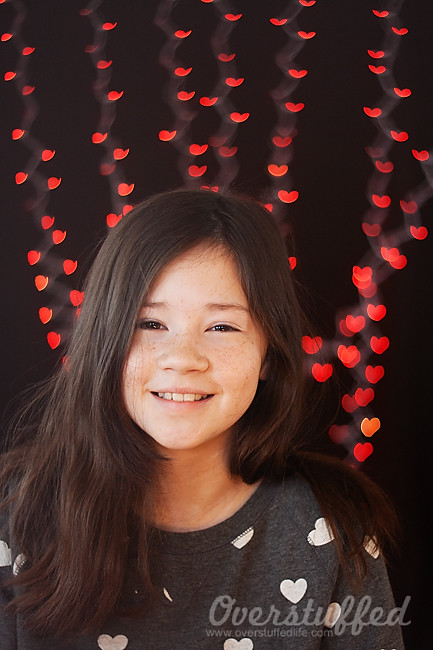
For the first photos, I used a large piece of dark fleece. I sewed a pocket in it for the crossbar of the photography stand, but it also serves as a warm blanket to watch movies in at our house. I then draped some red Christmas lights over the fleece. No worries that the cord is white, when we take our photos it won’t show up too much.
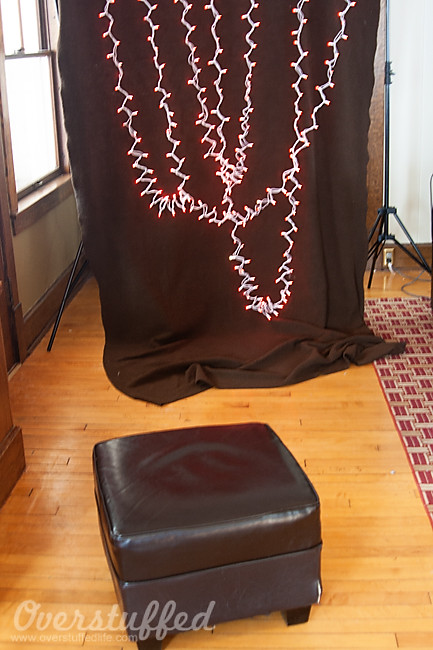
I set an ottoman about 6-8 feet in front of the lights. It’s important to have your subject be a good distance away from the lights to get the best looking bokeh.
Ready to see the magic?
Pretty cool, isn’t it?
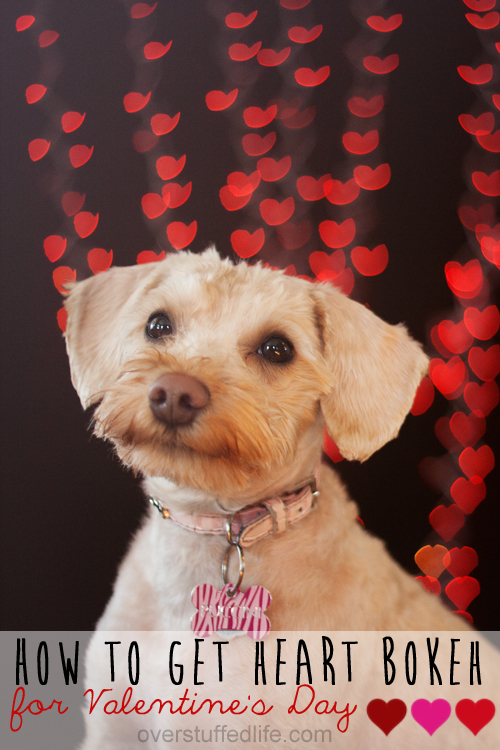
In order to get the bokeh, you’re going to want to shoot with your lens wide open (again, for better instructions on how exactly to get the bokeh in your photos, click on my tutorial HERE). I have the Canon EF 50mm f/1.8 II Camera Lens on my camera for these photos. It’s an amazing and very inexpensive little lens, and especially wonderful for bokeh photos like these.
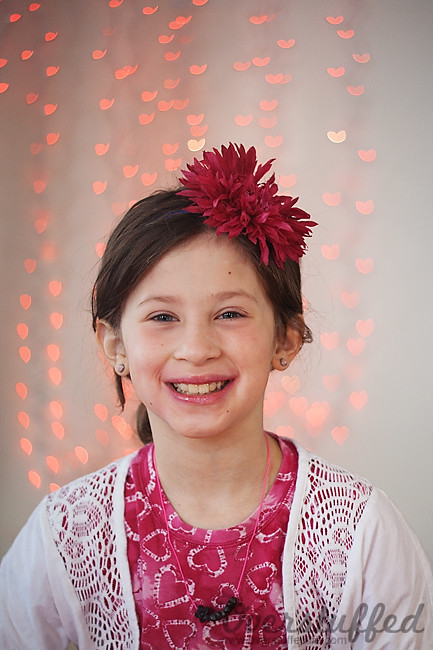
I also put a white paper backdrop on. The red lights don’t show up as brilliantly against the white background, but it still turned out a pretty fun photo for Valentine’s Day.
If only my children cooperated as well as my dog does for these photos. I guess holding treats up behind the camera just doesn’t quite do it for them the way it does for her!
You can use this fun custom bokeh trip with whatever shape you like—stars, hearts, squares, triangles, letters—go crazy with it and have fun!
More Photography Tutorials:
- Two Secrets to Better Snow Photos
- Four Creative Ways to Photograph Your Christmas Lights
- Make a Blog Banner in Photoshop Elements
- How to improve your photo composition


I always forget how fancy that is.
VERY cool.
And you and your dog {shaking head} 🙂